How to Connect to the AMI with PuTTY
To connect to the AMI Gateway with PuTTY you must:
gateway90
To connect to the AMI Gateway with PuTTY you must:
- Convert the PEM private key to the PPK format
- Create a login profile
Convert the Private Key to the PPK Format
The private key created by Amazon uses the industry standard PEM format. To connect to Gateway appliance using PuTTY or any other program that uses a different private key format, you need to convert the key pair into that application’s native format. Consult the documentation for your SSH program if you are unsure of its support for private key formats.
The following steps describe how to convert the key file using PuTTY. For other programs, please consult the user documentation accompanying the program.
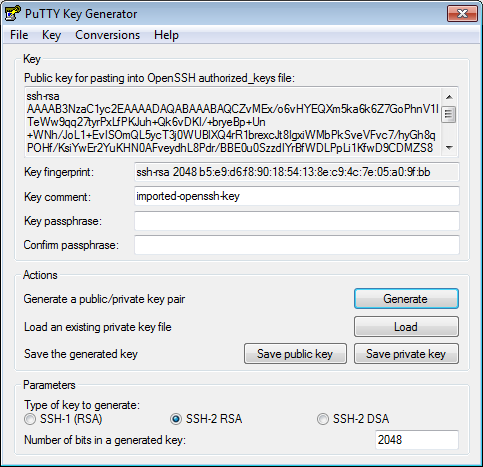
- Download and runputtygen.exeThis opens the PuTTY Key Generator.
- From the PuTTY Key Generator menu, selectConversions>Import Key. Select the key pair PEM file created previously.
- ClickSave private keyin the PuTTY Key Generator dialog.A warning about saving the key without a passphrase appears. Creating a passphrase is optional.
- To save the key without a passphrase, clickYes.When logging into the CA API Gateway AMI, no prompt to enter a passphrase appears.
- To create a passphrase, clickNo.Complete theKey passphraseandConfirm passphrasefields, then clickSave private keyagain.When logging into the CA API Gateway AMI, you must enter this passphrase.
- Enter a file name for the new private key. You can use the same name as before.Verify that the type is set toPuTTY Private Key Files (*.ppk)and clickSave.
- Close the PuTTY Key Generator dialog.
Create a Login Profile
In PuTTY, create a new login profile with the Public DNS for your instance. You will use this profile to log into the CA API Gateway each time.
To create a Login Profile in PuTTY:
- Launch PuTTY.
- Return to the Amazon EC2 Console Dashboard and clickInstancesunder Instances in the Navigation pane.
- In the bottom pane, locate the Public DNS of your instance and copy it.
- Switch back to PuTTY and paste the DNS into both theHost NameandSaved Sessionsfields.
- In the Category tree at the left, access:Connection >SSH >AuthThis opens the Options controlling SSH authentication page.
- In theAuthentication parameterssection, clickBrowseand locate the PPK private key file.
- In the Category tree at the left, clickSession.
- Click on your EC2 instance underSaved Sessionsand then clickSave.
You have now associated the private key with this Saved Session and can use it to log into the
CA API Gateway
.Connect to the Instance
Select the session you created and click
Open
.